abcdhe-28

Kayaking in the Dark: Shedding Light on the Importance of Nighttime Kayak Lights

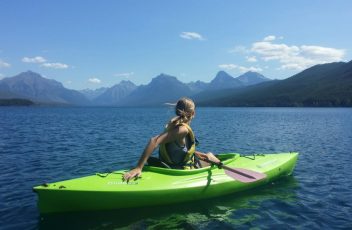
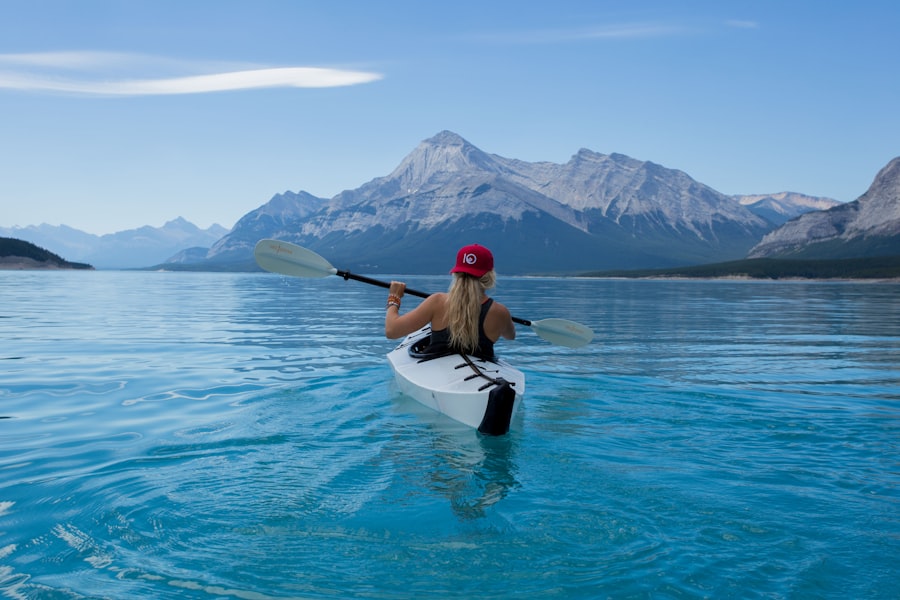
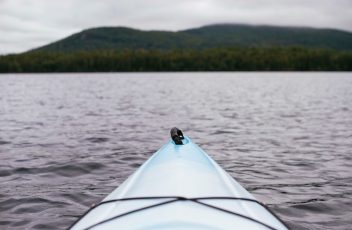
Kayaking is a popular outdoor activity that allows individuals to explore the beauty of nature while enjoying a peaceful and serene experience on the water. While kayaking during the day can be a wonderful experience, there is something truly magical about paddling under the stars and experiencing the tranquility of the night. Nighttime kayaking offers a unique adventure and allows paddlers to witness the beauty of nature in a whole new light.

Key Takeaways

  • Kayaking in the dark without proper lighting can be dangerous and increase the risk of accidents.
  • Nighttime kayak lights are essential for safety and visibility while paddling in low-light conditions.
  • Different types of kayak lights serve different functions, such as navigation, visibility, and signaling.
  • When choosing kayak lights for nighttime paddling, consider factors such as brightness, battery life, and durability.
  • Regulations and requirements for kayak lights at night vary by location and should be followed to avoid fines or accidents.

The Risks of Kayaking in the Dark Without Proper Lighting

While nighttime kayaking can be an exhilarating experience, it is important to recognize the risks involved in paddling in the dark without proper lighting. Without adequate lighting, kayakers are at an increased risk of accidents and injuries.

A. Reduced visibility

One of the main risks of kayaking in the dark is reduced visibility. Without proper lighting, it can be difficult for kayakers to see obstacles in the water, such as rocks, logs, or other watercraft. This can lead to collisions and accidents, putting both the kayaker and others at risk.

B. Increased risk of accidents

In addition to reduced visibility, kayaking in the dark without proper lighting increases the risk of accidents. Without lights to signal their presence, kayakers may not be visible to other boaters or watercraft, increasing the chances of collisions. This can be especially dangerous in areas with heavy boat traffic or in low-light conditions.

The Importance of Nighttime Kayak Lights for Safety

To ensure safety while kayaking at night, it is crucial to have proper lighting on your kayak. Nighttime kayak lights not only increase visibility but also enhance overall safety on the water.

A. Increased visibility

The primary function of kayak lights is to increase visibility for both the kayaker and others on the water. Navigation lights, deck lights, and headlamps all serve this purpose by illuminating the surrounding area and making the kayak more visible to others. This helps to prevent accidents and ensures that other boaters can see and avoid the kayak.

B. Enhanced safety

In addition to increased visibility, nighttime kayak lights also enhance overall safety on the water. By having proper lighting, kayakers can easily navigate through obstacles and avoid potential hazards. This reduces the risk of accidents and injuries, allowing paddlers to enjoy their nighttime kayaking adventures with peace of mind.

Different Types of Kayak Lights and Their Functions

Type of Kayak Light Function
Navigation Lights Used to signal the direction of the kayak to other boats and to help the kayaker navigate in low-light conditions.
Deck Lights Provide illumination on the kayak’s deck, making it easier to see equipment and gear and to navigate in low-light conditions.
Spotlights Used to illuminate a specific area or object, such as a fishing spot or a landing area.
Strobe Lights Used as a distress signal to attract attention in emergency situations.
Underwater Lights Used to attract fish and other marine life, as well as to provide a unique and visually appealing experience for the kayaker.

There are several different types of kayak lights available, each serving a specific function to enhance visibility and safety on the water.

A. Navigation lights

Navigation lights are essential for kayakers who plan to paddle at night. These lights are typically white or red/green and are used to signal the presence and direction of the kayak to other boaters. White navigation lights are used to indicate that a kayak is present, while red/green lights are used to indicate the direction in which the kayak is moving.

B. Deck lights

Deck lights are another type of kayak light that can be used to increase visibility. These lights are typically mounted on the deck of the kayak and provide additional illumination for the paddler. Deck lights can be white or colored and can help kayakers see obstacles in the water or navigate in low-light conditions.

C. Headlamps

Headlamps are a popular choice for nighttime kayaking as they provide hands-free lighting for the paddler. These lights are worn on the head and can be adjusted to point in different directions, allowing kayakers to see where they are going without having to hold a flashlight or other light source.

Tips for Choosing the Right Kayak Lights for Nighttime Paddling

When choosing kayak lights for nighttime paddling, there are several factors to consider to ensure you have the right lights for your needs.

A. Brightness

One of the most important factors to consider when choosing kayak lights is brightness. You want lights that are bright enough to provide adequate visibility but not so bright that they blind other boaters or interfere with their vision. Look for lights with adjustable brightness settings to ensure you can find the right level of illumination for your needs.

B. Battery life

Battery life is another important consideration when choosing kayak lights. You want lights that have a long battery life to ensure they will last for the duration of your paddling trip. Look for lights that use rechargeable batteries or have a long battery life to avoid running out of power while on the water.

C. Durability

Kayak lights need to be able to withstand the elements and rough conditions on the water. Look for lights that are waterproof and made from durable materials to ensure they can withstand splashes, rain, and other environmental factors. Additionally, consider lights that are easy to mount and secure on your kayak to prevent them from falling off or getting damaged during your paddling adventures.

Regulations and Requirements for Kayak Lights at Night

It is important to be aware of the regulations and requirements for kayak lights when paddling at night. Different countries and states may have specific rules regarding the use of lights on kayaks.

A. US Coast Guard requirements

In the United States, the U.S. Coast Guard has specific requirements for kayak lights when paddling at night. According to these regulations, kayaks must have a white navigation light visible from all directions and a red/green navigation light visible from at least two miles away. Additionally, kayaks must also have a white stern light visible from at least two miles away.

B. State regulations

In addition to federal regulations, individual states may also have their own regulations regarding kayak lights at night. It is important to research and understand the specific requirements for your state before heading out on a nighttime kayaking adventure.

How to Install and Use Kayak Lights for Maximum Visibility

Proper installation and usage of kayak lights are crucial to ensure maximum visibility on the water.

A. Proper installation

When installing kayak lights, it is important to follow the manufacturer’s instructions and ensure that the lights are securely mounted on your kayak. Lights should be positioned in a way that provides maximum visibility and does not interfere with your paddling or obstruct your view.

B. Correct usage

Using kayak lights correctly is also important for maximum visibility. Lights should be turned on before entering the water and should remain on throughout your paddling trip. Additionally, it is important to use lights in accordance with regulations and requirements to ensure the safety of yourself and others on the water.

The Benefits of Kayaking at Night with Proper Lighting

Kayaking at night with proper lighting offers a range of benefits that make it a unique and enjoyable experience.

A. Unique experience

Kayaking at night offers a unique experience that allows paddlers to witness the beauty of nature in a whole new light. The peacefulness and tranquility of the night, combined with the serenity of being on the water, create a truly magical experience that cannot be replicated during the day.

B. Peaceful atmosphere

Nighttime kayaking also offers a peaceful atmosphere that is unmatched by daytime paddling. The absence of noise and distractions allows paddlers to fully immerse themselves in the beauty of their surroundings and enjoy a sense of calm and tranquility.

Safety Precautions for Nighttime Kayaking Adventures

While nighttime kayaking can be a thrilling experience, it is important to take certain safety precautions to ensure a safe and enjoyable trip.

A. Wear a life jacket

Wearing a life jacket is essential for any kayaking adventure, but it is especially important when paddling at night. In the event of an accident or capsize, a life jacket can save your life and keep you afloat until help arrives.

B. Stay close to shore

When kayaking at night, it is best to stay close to shore and avoid venturing too far from land. This allows for easier navigation and reduces the risk of getting lost or encountering dangerous conditions.

C. Avoid alcohol

It is important to avoid consuming alcohol before or during a nighttime kayaking trip. Alcohol impairs judgment and coordination, increasing the risk of accidents and injuries on the water. It is best to save the celebratory drinks for after your paddling adventure.

Shedding Light on the Significance of Nighttime Kayak Lights

In conclusion, nighttime kayaking can be a thrilling and magical experience, but it is important to prioritize safety by using proper lighting. Kayak lights increase visibility, enhance safety, and ensure that both the kayaker and others on the water can see and avoid potential hazards. By choosing the right kayak lights, following regulations and requirements, and taking necessary safety precautions, paddlers can enjoy the beauty of nature under the stars while staying safe on their nighttime kayaking adventures.

abcdhe-26

Solo Kayak Loading: Mastering the Technique for Independent Adventures

Solo kayak loading refers to the process of loading a kayak onto a vehicle or trailer without any assistance. It requires the kayaker to have the necessary skills and knowledge to safely and efficiently load their kayak independently. While it may seem like a daunting task, learning how to load a kayak solo is an important skill for any kayaker to master.

Key Takeaways

  • Solo kayak loading is an essential skill for independent kayaking adventures.
  • Proper technique and understanding of the basics can prevent damage to the kayak and injury to the kayaker.
  • Preparing for solo kayak loading includes selecting the right gear and location.
  • A step-by-step guide can help ensure a safe and successful loading process.
  • Common mistakes to avoid include overloading the kayak and improper lifting technique.

Importance of Mastering Solo Kayak Loading Technique

Being able to load a kayak solo offers several benefits. Firstly, it allows kayakers to have more independence and flexibility in their adventures. They can go kayaking whenever they want, without having to rely on others to help them load and transport their kayak. This opens up opportunities for spontaneous trips and allows kayakers to explore new locations at their own pace.

Additionally, mastering solo kayak loading technique is crucial for safety reasons. Loading a kayak incorrectly can lead to accidents and damage to the kayak or vehicle. By learning the proper technique, kayakers can ensure that their kayak is securely loaded and that they are able to transport it safely.

Understanding the Basics of Kayak Loading

Before attempting to load a kayak solo, it is important to have a basic understanding of the different parts of a kayak and how they affect loading. A typical kayak consists of a hull, which is the main body of the kayak, and a deck, which is the top part of the kayak. The cockpit is where the kayaker sits, and there may also be hatches for storage.

The center of gravity is an important concept to understand when loading a kayak. The center of gravity refers to the point at which an object’s weight is evenly distributed. When loading a kayak, it is important to keep the center of gravity low and centered in order to maintain stability.

Preparing for Solo Kayak Loading

Metrics Values
Weight of Kayak 30 lbs
Length of Kayak 10 feet
Width of Kayak 2.5 feet
Height of Kayak 1.5 feet
Recommended Loading Time 30 minutes
Recommended Loading Location Flat surface near water
Recommended Loading Assistance None

Before attempting to load a kayak solo, it is important to choose the right location for loading. Ideally, this should be a flat and level surface that provides enough space to maneuver the kayak. It is also important to gather the necessary equipment and tools, such as straps or ropes for securing the kayak, and any additional padding or supports that may be needed.

Step-by-Step Guide to Solo Kayak Loading

1. Position your vehicle or trailer in the chosen loading location, ensuring that it is stable and secure.

2. Place a protective padding or mat on the roof or bed of your vehicle to prevent any damage to the kayak.

3. Lift the kayak onto one end, with the cockpit facing up. Position it so that it is parallel to your vehicle or trailer.

4. Lift the kayak onto your shoulder, using proper lifting techniques to avoid strain or injury.

5. Walk towards your vehicle or trailer, keeping the kayak balanced on your shoulder.

6. Carefully position the kayak onto the roof or bed of your vehicle, ensuring that it is centered and aligned properly.

7. Secure the kayak using straps or ropes, making sure that they are tight and secure.

8. Double-check that the kayak is securely fastened before driving off.

Common Mistakes to Avoid During Solo Kayak Loading

There are several common mistakes that people make when loading a kayak solo, which can be dangerous and lead to accidents or damage. One common mistake is not properly securing the kayak to the vehicle or trailer. This can result in the kayak shifting during transport, which can be hazardous and cause damage to both the kayak and the vehicle.

Another common mistake is not properly balancing the weight of the kayak during loading. If the weight is not evenly distributed, it can cause the kayak to tip over, potentially causing injury or damage. It is important to take the time to ensure that the kayak is balanced and centered before securing it for transport.

Tips for Securing Your Kayak for Independent Adventures

To properly secure a kayak for transport, it is important to use straps or ropes that are specifically designed for this purpose. These should be strong and durable, and should be tightened securely to prevent any movement or shifting of the kayak during transport. It is also a good idea to use additional padding or supports to protect the kayak from any potential damage.

When securing the kayak, it is important to distribute the tension evenly across all straps or ropes. This will help to ensure that the kayak is held securely in place and will prevent any unnecessary stress or strain on the kayak or vehicle.

Maintaining Kayak Balance During Loading

Maintaining balance when loading a kayak solo is crucial to prevent accidents and injuries. To maintain balance, it is important to keep the kayak centered and aligned properly during the loading process. This can be achieved by using proper lifting techniques and taking the time to position the kayak correctly on the vehicle or trailer.

It is also important to be mindful of the center of gravity when loading a kayak. Keeping the center of gravity low and centered will help to maintain stability and prevent the kayak from tipping over. This can be achieved by evenly distributing the weight of the kayak and ensuring that it is properly balanced.

Safety Precautions for Solo Kayak Loading

When loading a kayak solo, there are several safety precautions that should be taken to ensure a safe and successful loading process. Firstly, it is important to use proper lifting techniques to avoid strain or injury. This includes bending at the knees and using your legs, rather than your back, to lift the kayak.

It is also important to take your time and not rush the loading process. Trying to load a kayak quickly can lead to mistakes and accidents. By taking your time and being methodical, you can ensure that the kayak is loaded safely and securely.

Advantages of Independent Kayaking and Solo Kayak Loading Mastery

Mastering the skill of solo kayak loading offers several advantages for kayakers. It allows for more independence and flexibility in planning kayaking adventures, as kayakers can load and transport their kayak whenever they want, without relying on others for assistance. Additionally, being able to load a kayak solo is important for safety reasons, as it ensures that the kayak is securely loaded and can be transported safely.

By following the step-by-step guide and taking the necessary safety precautions, kayakers can learn how to load a kayak solo and enjoy the benefits of independent kayaking. With practice and patience, solo kayak loading can become a routine and effortless task, allowing kayakers to focus on enjoying their time on the water.

abcdhe-24

Rooftop Kayaking: How to Transport 2 Kayaks Without a Rack

Rooftop kayaking is a popular method of transporting kayaks for outdoor enthusiasts. It involves securing kayaks on the roof of a vehicle without the use of a traditional kayak rack. This method allows individuals to transport their kayaks safely and conveniently, without the need for additional equipment. Rooftop kayaking offers several benefits, including cost savings, flexibility, and ease of use.

Key Takeaways

  • Rooftop kayaking is a fun and exciting way to explore waterways.
  • Transporting two kayaks without a rack is possible with the right materials and precautions.
  • Consider factors such as weight capacity and wind resistance before transporting kayaks on your rooftop.
  • Materials needed for transporting kayaks without a rack include foam blocks, straps, and bow and stern lines.
  • Follow a step-by-step guide and take safety precautions to ensure a successful and safe rooftop kayak transport.

Why Transport 2 Kayaks Without a Rack?

There are several reasons why someone may need to transport kayaks without a rack. One common reason is that they may not have a kayak rack installed on their vehicle. Installing a kayak rack can be expensive and time-consuming, so transporting kayaks without a rack provides a more affordable and convenient option.

Another reason is that individuals may be renting a vehicle or borrowing one from a friend or family member. In these cases, it may not be possible to install a kayak rack on the vehicle. Transporting kayaks without a rack allows individuals to still enjoy their kayaking adventures without the need for additional equipment.

Considerations Before Transporting Kayaks on Your Rooftop

Before transporting kayaks on your rooftop without a rack, there are several important considerations to keep in mind. First, you need to ensure that your vehicle has the weight capacity to support the weight of the kayaks. Overloading your vehicle can lead to damage and accidents, so it’s crucial to check your vehicle’s weight capacity before proceeding.

Next, you need to consider the height clearance of your vehicle. Kayaks can add significant height to your vehicle, so it’s important to ensure that you have enough clearance to safely navigate under bridges and other low-clearance areas.

Additionally, you need to consider the length of your kayaks. If your kayaks are too long for your vehicle’s roof, they may hang over the front or back, which can be dangerous and illegal. It’s important to measure the length of your kayaks and ensure that they can be safely transported on your vehicle.

Lastly, you need to consider the weather conditions. Strong winds can make it difficult to transport kayaks on your rooftop, as they can cause the kayaks to shift or even fly off the roof. It’s important to check the weather forecast before transporting your kayaks and avoid driving in high winds if possible.

Materials Needed for Transporting Kayaks Without a Rack

Material Description Price
Pool Noodles Foam tubes used to cushion and secure kayaks on roof of car 10 for a pack of 4
Ratchet Straps Heavy-duty straps used to secure kayaks to roof of car 20 for a pack of 2
Bungee Cords Elastic cords used to secure kayaks to roof of car 10 for a pack of 6
Tie-Downs Straps with hooks used to secure kayaks to car’s trunk or hatchback 15 for a pack of 2
Foam Blocks Blocks of foam used to cushion and secure kayaks on roof of car 30 for a set of 2

To transport kayaks without a rack, you will need a few key materials. The first is foam blocks or pool noodles. These will serve as padding between the kayaks and the roof of your vehicle, providing protection and stability during transport.

You will also need tie-down straps to secure the kayaks to your vehicle. These straps should be strong and durable, capable of withstanding the weight and movement of the kayaks during transport.

In addition to tie-down straps, it’s recommended to use bow and stern lines. These lines attach to the front and back of the kayaks and provide additional security during transport. They help prevent the kayaks from shifting or sliding off the roof.

Lastly, ratchet straps can be used for added security, although they are optional. Ratchet straps provide extra tension and stability, ensuring that the kayaks remain securely in place during transport.

Step-by-Step Guide to Transporting 2 Kayaks Without a Rack

1. Placing foam blocks or pool noodles on the roof of your vehicle: Start by placing foam blocks or pool noodles on the roof of your vehicle. These will serve as padding between the kayaks and the roof, preventing any damage or scratches.

2. Positioning kayaks on top of the foam blocks or pool noodles: Carefully position the kayaks on top of the foam blocks or pool noodles. Make sure they are centered and evenly distributed on the roof of your vehicle.

3. Securing kayaks with tie-down straps: Use tie-down straps to secure the kayaks to your vehicle. Start by attaching one end of the strap to a secure point on the roof, such as a roof rack or door handle. Then, loop the strap around the kayak and attach the other end to another secure point on the roof. Repeat this process for each kayak, ensuring that they are tightly secured.

4. Attaching bow and stern lines: Attach bow and stern lines to the front and back of each kayak. These lines should be attached to secure points on the vehicle, such as tow hooks or bumper mounts. Make sure the lines are tight and provide additional stability during transport.

5. Optional: using ratchet straps for added security: If desired, use ratchet straps for added security. These straps can be attached to the roof of your vehicle and tightened to provide extra tension and stability.

Tips for Securing Kayaks on Your Rooftop

When securing kayaks on your rooftop without a rack, there are a few tips to keep in mind to ensure a safe and secure transport.

First, double-check all tie-down straps and bow/stern lines before driving. Make sure they are tight and secure, with no signs of looseness or damage. It’s important to regularly check these straps throughout your journey to ensure they remain tight and in good condition.

Second, consider using additional padding for added protection. In addition to foam blocks or pool noodles, you can use towels or blankets to provide extra cushioning between the kayaks and the roof of your vehicle. This will help prevent any scratches or damage during transport.

Lastly, avoid over-tightening straps. While it’s important to ensure that the kayaks are securely fastened, over-tightening straps can cause damage to both the kayaks and your vehicle. Use enough tension to keep the kayaks in place, but not so much that it puts unnecessary strain on the straps or the kayaks.

Safety Precautions to Take While Transporting Kayaks Without a Rack

While transporting kayaks without a rack can be a convenient and cost-effective option, it’s important to take certain safety precautions to ensure a safe journey.

First, before driving, check for any loose or damaged parts. Make sure all straps, lines, and attachments are secure and in good condition. If you notice any signs of wear or damage, replace them before proceeding.

Second, avoid sudden stops or sharp turns. Kayaks can shift during transport, especially if they are not properly secured. To prevent any accidents or damage, drive cautiously and avoid any sudden movements that could cause the kayaks to shift or slide off the roof.

Lastly, drive at a safe speed. High speeds can create additional wind resistance, which can cause the kayaks to shift or even fly off the roof. It’s important to drive at a speed that is appropriate for the weather conditions and the weight of your load.

Common Mistakes to Avoid While Transporting Kayaks Without a Rack

When transporting kayaks without a rack, there are several common mistakes that should be avoided to ensure a safe and successful journey.

One common mistake is over-tightening straps. While it’s important to ensure that the kayaks are securely fastened, over-tightening straps can cause damage to both the kayaks and your vehicle. Use enough tension to keep the kayaks in place, but not so much that it puts unnecessary strain on the straps or the kayaks.

Another mistake is not using bow and stern lines. Bow and stern lines provide additional security during transport, helping to prevent the kayaks from shifting or sliding off the roof. It’s important to use these lines in conjunction with tie-down straps for a secure and stable transport.

Lastly, not checking for loose or damaged parts before driving is a common mistake. It’s important to regularly check all straps, lines, and attachments to ensure they are secure and in good condition. If you notice any signs of wear or damage, replace them before proceeding.

Alternatives to Transporting Kayaks Without a Rack

While transporting kayaks without a rack can be a convenient option, there are alternatives available for those who prefer a more traditional method.

One alternative is investing in a kayak rack. Kayak racks are specifically designed to securely hold kayaks on the roof of a vehicle. They provide added stability and ease of use, making them a popular choice for many kayakers.

Another alternative is using a trailer hitch rack. These racks attach to the trailer hitch of your vehicle and allow you to transport kayaks on the back of your vehicle. This option is particularly useful for individuals who have limited roof space or prefer not to transport kayaks on the roof.

Lastly, if you don’t have access to a kayak rack or trailer hitch rack, you can consider renting a vehicle with a built-in kayak rack. Many rental companies offer vehicles with kayak racks installed, making it easy and convenient to transport your kayaks.

Conclusion and Final Thoughts on Rooftop Kayaking

Rooftop kayaking offers outdoor enthusiasts a convenient and cost-effective method of transporting their kayaks. By following the proper steps and taking necessary safety precautions, individuals can safely transport their kayaks without the need for a traditional kayak rack.

It’s important to consider the weight capacity and height clearance of your vehicle, as well as the length of your kayaks before proceeding with rooftop kayaking. Additionally, using the right materials, such as foam blocks or pool noodles, tie-down straps, bow and stern lines, and optional ratchet straps, will ensure a secure transport.

While rooftop kayaking can be a great option, it’s important to consider alternatives, such as investing in a kayak rack or using a trailer hitch rack, if they better suit your needs. Ultimately, the goal is to enjoy your kayaking adventures safely and conveniently, and rooftop kayaking can provide just that with the proper equipment and safety precautions.

abcdhe-22

Secure Your Kayak: A Step-by-Step Guide on How to Attach an Anchor

When it comes to kayaking, safety should always be a top priority. One important aspect of kayaking safety is anchoring. Anchoring not only keeps your kayak in place, but it also provides stability and security while you fish or explore. In this article, we will discuss the importance of anchoring for kayaking safety and the benefits it provides for fishing and exploring.

Anchoring is crucial for kayaking safety because it prevents your kayak from drifting away in strong currents or winds. It keeps you in one place, allowing you to focus on your activities without worrying about being carried away. Whether you are fishing or exploring, having a secure anchor will give you peace of mind and allow you to fully enjoy your time on the water.

Anchoring also provides several benefits for fishing and exploring. When fishing, anchoring allows you to stay in one spot, increasing your chances of catching fish. It keeps your kayak stable and minimizes any movement that could scare away fish. Additionally, anchoring allows you to position yourself in the best location for casting and reeling in your catch.

For exploring, anchoring allows you to take in the scenery without constantly paddling or drifting away. It gives you the opportunity to relax and enjoy your surroundings. Whether you are taking photos or simply taking a break, having a secure anchor will ensure that you stay in one place and don’t miss out on any of the beauty around you.

Key Takeaways

  • Anchoring is important for kayaking safety
  • Choosing the right type of anchor is crucial for your kayak
  • Clearing the deck and finding the anchor point is necessary before attaching the anchor
  • Securely attaching the anchor requires following step-by-step instructions
  • Tying knots and preventing tangles is important for securing the anchor line

Types of Anchors: Choosing the Right One for Your Kayak

There are several types of anchors available for kayaks, each with its own advantages and disadvantages. When choosing an anchor for your kayak, there are a few factors to consider. These include the type of water you will be kayaking in, the size and weight of your kayak, and personal preference.

One common type of anchor is the grapnel anchor. This anchor has multiple prongs that dig into the bottom of the water body, providing a secure hold. Grapnel anchors are versatile and can be used in a variety of water conditions. However, they may not be suitable for rocky or weedy bottoms as the prongs can get caught.

Another type of anchor is the mushroom anchor. This anchor has a wide, flat bottom that provides a strong hold. Mushroom anchors are ideal for sandy or muddy bottoms, as they can easily bury themselves in the sediment. However, they may not be as effective in rocky or weedy areas.

A third type of anchor is the claw anchor. This anchor has a sharp, pointed tip that digs into the bottom and provides a secure hold. Claw anchors are known for their strong holding power and are suitable for a variety of bottom types. However, they can be more expensive and heavier than other types of anchors.

Preparing Your Kayak: Clearing the Deck and Finding the Anchor Point

Before attaching your anchor, it is important to clear the deck of any obstacles that could interfere with the anchoring process. Remove any gear or equipment that could get in the way and ensure that there are no loose items that could fall overboard.

Once the deck is clear, you need to find the right anchor point on your kayak. This is typically located at the bow or stern of the kayak, where there is a designated attachment point. It is important to choose a strong and secure attachment point to ensure that your anchor stays in place.

Proper positioning of your kayak is also crucial when anchoring. You want to position your kayak so that it is facing into the wind or current, depending on which is stronger. This will help to minimize any movement and keep your kayak stable while anchored.

Attaching the Anchor: Step-by-Step Instructions for a Secure Connection

Step Description Time
Step 1 Choose the anchor type and location 5 minutes
Step 2 Drill the hole for the anchor 10 minutes
Step 3 Insert the anchor into the hole 2 minutes
Step 4 Tighten the anchor with a wrench 5 minutes
Step 5 Attach the object to the anchor 2 minutes
Step 6 Test the anchor for stability 5 minutes

Attaching the anchor to your kayak requires a secure connection to ensure that it stays in place. Follow these step-by-step instructions for a secure attachment:

1. Begin by attaching the anchor line to the anchor. This can be done using a secure knot such as a bowline or a cleat hitch.

2. Once the anchor line is attached to the anchor, feed the line through the anchor trolley or attachment point on your kayak.

3. Pull the anchor line through the attachment point and secure it using a cleat hitch or another secure knot.

4. Ensure that there is enough slack in the anchor line to allow for movement, but not too much that it becomes tangled or poses a safety hazard.

5. Double-check all connections and knots to ensure that they are secure before proceeding.

Securing the Anchor Line: Tying Knots and Preventing Tangles

Securing the anchor line is essential to prevent tangles and ensure that your anchor stays in place. There are several different types of knots that can be used to secure the anchor line, depending on personal preference and the type of anchor you are using.

One common knot used for securing the anchor line is the cleat hitch. This knot is easy to tie and provides a secure hold. To tie a cleat hitch, simply wrap the anchor line around a cleat or other attachment point on your kayak, then cross the line over itself and wrap it around the cleat again. Finish by tying a half hitch to secure the line in place.

Another knot that can be used is the bowline knot. This knot creates a loop at the end of the anchor line, which can be used to attach it to an attachment point on your kayak. To tie a bowline knot, create a small loop in the line, then pass the end of the line through the loop, around behind the standing part of the line, and back through the loop. Tighten the knot by pulling on the standing part of the line and secure it in place.

To prevent tangles, it is important to keep the anchor line organized and free from obstructions. Avoid letting the line drag in the water or get caught on any gear or equipment. Use a line management system or anchor trolley to keep the line organized and prevent it from tangling.

Testing the Anchor: Checking for Stability and Adjusting as Needed

Once the anchor is attached and the line is secured, it is important to test the anchor to ensure that it is stable and holding properly. This can be done by applying gentle pressure to the anchor line and observing how the kayak responds.

A stable anchor will keep the kayak in place without any significant movement. If you notice that the kayak is still drifting or moving, you may need to adjust the anchor or find a different location to anchor.

To adjust the anchor, simply pull in some slack on the anchor line and re-secure it. This will help to reposition the anchor and provide a more secure hold. It may take a few adjustments to find the right position and ensure that the anchor is holding properly.

Retrieving the Anchor: Techniques for Safely and Efficiently Removing the Anchor

When it is time to retrieve your anchor, it is important to do so safely and efficiently. Follow these steps for a safe and efficient retrieval:

1. Begin by pulling in any slack on the anchor line, taking care not to pull too hard or jerk the kayak.

2. Once all slack has been pulled in, begin pulling up on the anchor line slowly and steadily.

3. As you pull up on the anchor line, use your paddle or another tool to help break any suction or resistance that may be present.

4. Continue pulling up on the anchor line until the anchor breaks free from the bottom.

5. Once the anchor is free, carefully bring it into the kayak and secure it in a safe location.

It is important to practice caution when retrieving the anchor, as it can be heavy and potentially cause injury if not handled properly. Take your time and use proper technique to ensure a safe retrieval.

Additional Safety Tips: Precautions to Take When Anchoring in Different Conditions

When anchoring in different conditions, there are several precautions that should be taken to ensure safety. These include:

1. In windy conditions, use a heavier anchor or consider using multiple anchors to provide additional stability.

2. In strong currents, position your kayak so that it is facing into the current to minimize movement.

3. In rocky or weedy areas, choose an anchor that is less likely to get caught or tangled.

4. Always check the weather forecast before heading out and be prepared for changing conditions.

5. Have a plan in place for emergencies, such as a backup anchor or a way to quickly release the anchor if needed.

Taking these precautions will help to ensure that you have a safe and enjoyable kayaking experience, regardless of the conditions you encounter.

Maintenance and Storage: Caring for Your Anchor and Equipment

Proper maintenance and storage of your anchor and equipment is essential for their longevity and effectiveness. Here are some tips for caring for your anchor and equipment:

1. Rinse your anchor with fresh water after each use to remove any salt or debris that may have accumulated.

2. Inspect your anchor regularly for any signs of damage or wear, such as rust or fraying.

3. Store your anchor in a dry location to prevent rusting or corrosion.

4. Check your anchor line for any signs of wear or damage and replace as needed.

5. Inspect all attachment points and knots regularly to ensure that they are secure and in good condition.

By properly maintaining and storing your anchor and equipment, you can ensure that they will last for many seasons of kayaking.

Enjoying Safe and Secure Kayaking with Proper Anchoring Techniques

In conclusion, anchoring is an important aspect of kayaking safety that should not be overlooked. It provides stability and security while fishing or exploring, allowing you to fully enjoy your time on the water. By choosing the right anchor, properly attaching it to your kayak, securing the anchor line, and following proper retrieval techniques, you can ensure a safe and enjoyable kayaking experience.

Remember to take precautions when anchoring in different conditions and always be prepared for emergencies. Proper maintenance and storage of your anchor and equipment will also help to prolong their lifespan and effectiveness.

By practicing proper anchoring techniques and prioritizing safety, you can enjoy many memorable adventures on the water while keeping yourself and others safe. So grab your kayak, choose the right anchor, and get ready for a safe and secure kayaking experience!

abcdhe-20

Kayaking Made Easy: How to Safely Transport Your Kayak on a Pickup Truck

Transporting a kayak on a pickup truck is a convenient and efficient way to take your kayak to different bodies of water for an exciting day of paddling. Whether you’re heading to a nearby lake, river, or even the ocean, having a pickup truck can make the process of transporting your kayak much easier. In this article, we will explore the basics of kayak transportation on a pickup truck, including choosing the right truck, essential tools and equipment, securing your kayak properly, and avoiding common mistakes. We will also discuss legal requirements and maintenance tips for your kayak after transport. Additionally, we will provide recommendations for popular kayaking destinations and essential gear for your kayaking trips.

Key Takeaways

  • Understanding the basics of kayak transportation on a pickup truck is essential for safe and efficient travel.
  • Choosing the right pickup truck for your kayak depends on factors such as size, weight, and towing capacity.
  • Essential tools and equipment for transporting your kayak include tie-down straps, foam blocks, and a kayak carrier.
  • Preparing your kayak for transport on a pickup truck involves cleaning it, removing any loose items, and securing the hatch covers.
  • Securing your kayak to the pickup truck requires proper placement, tightening of straps, and checking for any movement during transport.

Understanding the Basics of Kayak Transportation on a Pickup Truck

Using a pickup truck for kayak transportation offers several benefits. Firstly, pickup trucks have ample space in the bed to accommodate kayaks of various sizes. This means you don’t have to worry about fitting your kayak inside a car or on top of an SU

Secondly, pickup trucks have higher ground clearance, making it easier to access remote launch sites or navigate rough terrain. Lastly, pickup trucks are designed to handle heavy loads, so you can transport multiple kayaks or other gear without worrying about exceeding weight limits.

When transporting a kayak on a pickup truck, there are several factors to consider. The size and weight capacity of the truck are crucial considerations. You need to ensure that your truck can safely handle the weight of your kayak and any additional gear you may be carrying. Additionally, you should consider the length of your kayak and whether it will fit securely in the bed of your truck without overhanging too much.

Choosing the Right Pickup Truck for Your Kayak

Brand Model Bed Length (ft) Towing Capacity (lbs) Payload Capacity (lbs) Price Range
Ford F-150 5.5, 6.5, 8 5,000-13,200 1,500-3,270 28,940-70,825
Chevrolet Silverado 1500 5.8, 6.6, 8.2 6,500-13,300 1,680-2,280 28,600-57,795
Ram 1500 5.7, 6.4, 8 6,280-12,750 1,500-2,320 32,795-57,715
Toyota Tundra 5.5, 6.5, 8.1 6,400-10,200 1,440-2,080 33,675-53,850
Nissan Titan 5.5, 6.5, 8 9,210-11,040 1,610-2,990 36,190-59,280

When it comes to choosing the right pickup truck for kayak transportation, size and weight capacity are key factors to consider. You want to make sure that your truck has enough space in the bed to accommodate your kayak without any overhang. Additionally, you need to ensure that the truck has a sufficient weight capacity to handle the weight of your kayak and any additional gear you may be carrying.

There are various types of pickup trucks suitable for kayak transportation. Mid-size trucks, such as the Toyota Tacoma or Chevrolet Colorado, are popular choices due to their versatility and maneuverability. They offer a good balance between size and fuel efficiency. Full-size trucks, like the Ford F-150 or Chevrolet Silverado, provide more space and towing capacity, making them suitable for larger kayaks or multiple kayaks. It’s important to consider your specific needs and preferences when choosing a pickup truck for kayak transportation.

Essential Tools and Equipment for Transporting Your Kayak

To ensure the safe and secure transportation of your kayak on a pickup truck, there are several essential tools and equipment you will need. These include tie-down straps, foam blocks or cradles, ratchet straps, and bow and stern lines.

Tie-down straps are used to secure your kayak to the bed of the truck. They should be made of durable material, such as nylon or polyester, and have a high weight capacity. Foam blocks or cradles are used to provide cushioning and support for your kayak. They help distribute the weight evenly and prevent any damage to the hull of your kayak. Ratchet straps are used to tighten the tie-down straps securely. They have a mechanism that allows you to apply more tension than traditional straps, ensuring a tight and secure fit. Bow and stern lines are used to provide additional security by attaching the front and back of your kayak to the truck’s bumper or tow hooks.

Preparing Your Kayak for Transport on a Pickup Truck

Before loading your kayak onto the pickup truck, there are several steps you should take to prepare it for transport. Firstly, you should clean and dry your kayak thoroughly. This will help prevent any dirt, debris, or moisture from getting into the truck bed and potentially damaging your kayak. Additionally, you should remove any loose items from your kayak, such as paddles, life jackets, or fishing gear. These items can become projectiles during transport and pose a safety hazard.

When positioning your kayak on the pickup truck, it’s important to ensure that it is centered and balanced. This will help distribute the weight evenly and prevent any instability during transport. If you are transporting multiple kayaks, make sure they are stacked securely and that the weight is evenly distributed between them.

Securing Your Kayak to the Pickup Truck: Tips and Techniques

Properly securing your kayak to the pickup truck is crucial for safe transportation. When using tie-down straps, it’s important to place them in the correct locations to ensure a secure fit. The straps should be attached to the front and back of the kayak, as well as the sides if necessary. Foam blocks or cradles should be placed under the kayak to provide cushioning and support. They should be positioned in a way that prevents any movement or shifting of the kayak during transport.

When tensioning the tie-down straps, it’s important to apply enough pressure to secure the kayak tightly without causing any damage. You should tighten the straps gradually, making sure they are evenly tensioned on both sides of the kayak. Ratchet straps can be used to apply additional tension if needed.

Using bow and stern lines is highly recommended for added security. These lines should be attached to the front and back of your kayak and secured to the truck’s bumper or tow hooks. They help prevent any forward or backward movement of the kayak during transport.

Safely Loading and Unloading Your Kayak on a Pickup Truck

Loading and unloading your kayak onto a pickup truck can be challenging, especially if you’re doing it alone. There are several techniques you can use to make this process easier and safer. Firstly, it’s important to lift the kayak properly to avoid straining your back or causing any injuries. You should bend your knees and use your leg muscles to lift the kayak, keeping your back straight. It’s also helpful to have a second person to assist you in lifting and placing the kayak onto the truck.

Using a loading ramp can make the process of loading and unloading your kayak much easier. A loading ramp provides a gradual incline, allowing you to roll the kayak onto the truck bed instead of lifting it. This can be especially helpful if you have a heavy or large kayak.

Avoiding Common Mistakes When Transporting Your Kayak on a Pickup Truck

When transporting your kayak on a pickup truck, there are several common mistakes you should avoid. Firstly, overloading the pickup truck can lead to instability and unsafe driving conditions. You should always check the weight capacity of your truck and ensure that you are not exceeding it. Additionally, improper placement of tie-down straps and foam blocks/cradles can result in an insecure fit and potential damage to your kayak. It’s important to follow the manufacturer’s instructions and guidelines for securing your kayak properly.

Failing to secure the kayak properly is another common mistake. It’s important to double-check all straps, lines, and attachments before hitting the road. This will help prevent any accidents or damage during transport.

Legal Requirements for Transporting Your Kayak on a Pickup Truck

When transporting your kayak on a pickup truck, it’s important to be aware of state and local regulations regarding kayak transportation. These regulations may vary depending on where you live and where you plan to transport your kayak. Some states require additional safety equipment, such as flags or lights, when transporting kayaks on pickup trucks. It’s important to familiarize yourself with these regulations and ensure that you are in compliance.

Additionally, it’s important to have the necessary safety equipment for kayak transportation. This includes proper lighting, reflective tape, and any other equipment required by your state or local regulations. It’s always a good idea to check with your local authorities or Department of Transportation for specific requirements.

Maintenance and Care Tips for Your Kayak After Transport

After transporting your kayak on a pickup truck, it’s important to take care of it properly to ensure its longevity and performance. Firstly, you should clean and dry your kayak thoroughly to remove any dirt, debris, or moisture that may have accumulated during transport. This will help prevent any damage or corrosion. Additionally, you should inspect your kayak for any signs of wear and tear or damage. This includes checking the hull, seams, and fittings for any cracks or leaks. If you notice any issues, it’s important to address them promptly to prevent further damage.

Exploring New Places with Your Kayak: Where to Go and What to Bring

Now that you know how to transport your kayak on a pickup truck safely, it’s time to explore new places and enjoy the thrill of kayaking. There are numerous popular destinations for kayaking, ranging from serene lakes and rivers to challenging whitewater rapids and coastal waters. Some popular destinations include Lake Tahoe in California, the Colorado River in Arizona, and the Boundary Waters Canoe Area Wilderness in Minnesota.

When planning a kayaking trip, it’s important to bring essential gear and equipment. This includes a life jacket or personal flotation device (PFD), a paddle, a dry bag for storing personal items, sunscreen, a hat, and appropriate clothing for the weather conditions. It’s also a good idea to bring a first aid kit, a whistle or signaling device, and a map or GPS device for navigation.

Properly transporting your kayak on a pickup truck is essential for ensuring its safety and longevity. By choosing the right truck, using the necessary tools and equipment, securing your kayak properly, and following legal requirements, you can enjoy hassle-free transportation and explore new kayaking destinations. Remember to take care of your kayak after transport by cleaning and inspecting it regularly. With the right preparation and equipment, you can embark on exciting kayaking adventures and create lasting memories.

abcdhe-18

Exploring the Waters: Is Kayaking Safe During Pregnancy?

Kayaking is a popular water sport that offers a range of physical and mental health benefits. However, when it comes to kayaking during pregnancy, it’s important to understand the potential risks and benefits involved. While many pregnant women may be hesitant to engage in physical activities like kayaking, it can actually be a safe and enjoyable form of exercise if certain precautions are taken.

Understanding the risks and benefits of kayaking during pregnancy is crucial for expectant mothers. By being informed, women can make educated decisions about whether or not to participate in this activity. It’s important to remember that every pregnancy is different, and what may be safe for one woman may not be safe for another. Consulting with a healthcare provider is essential before engaging in any physical activity during pregnancy.

Key Takeaways

  • Kayaking during pregnancy can have both physical and mental health benefits.
  • However, there are also potential risks and dangers associated with kayaking while pregnant.
  • To ensure safety, pregnant women should take necessary precautions and choose the right equipment.
  • Proper technique and form are important when kayaking during pregnancy.
  • Alternative water sports and activities may be a safer option for pregnant women.

The Benefits of Kayaking During Pregnancy: Physical and Mental Health Benefits

Engaging in regular physical activity during pregnancy is important for both the mother and the baby. Kayaking offers a variety of benefits that can contribute to a healthy pregnancy.

Improved cardiovascular health: Kayaking is a great way to get your heart rate up and improve cardiovascular health. It helps to strengthen the heart and lungs, which can be beneficial during labor and delivery.

Reduced stress and anxiety: Pregnancy can be a stressful time, and kayaking provides an opportunity to relax and unwind. Being out on the water can have a calming effect on the mind, reducing stress and anxiety levels.

Low-impact exercise: Kayaking is a low-impact form of exercise that puts minimal stress on the joints. This makes it an ideal activity for pregnant women who may experience discomfort or pain in their joints.

Improved balance and coordination: As the body changes during pregnancy, maintaining balance can become more challenging. Kayaking requires balance and coordination, which can help pregnant women improve these skills.

The Risks of Kayaking During Pregnancy: Understanding the Potential Dangers

While kayaking can offer numerous benefits during pregnancy, it’s important to be aware of the potential risks involved. Understanding these risks can help expectant mothers make informed decisions about whether or not to participate in this activity.

Risk of falling or capsizing: Kayaking involves being on the water, which can be unpredictable at times. There is a risk of falling out of the kayak or capsizing, which can be dangerous for both the mother and the baby.

Risk of dehydration and overheating: Pregnant women are more susceptible to dehydration and overheating, and kayaking can increase the risk of these conditions. It’s important to stay hydrated and take breaks when needed to avoid these risks.

Risk of injury from improper technique or equipment: Using improper technique or equipment while kayaking can increase the risk of injury. It’s important to use proper form and ensure that all equipment is in good working condition to minimize these risks.

Safety Precautions for Kayaking During Pregnancy: What You Need to Know

Topic Information
Introduction Explanation of kayaking during pregnancy
Benefits Benefits of kayaking during pregnancy
Risks Risks associated with kayaking during pregnancy
Safety Precautions Important safety precautions for kayaking during pregnancy
Equipment Recommended equipment for kayaking during pregnancy
Expert Advice Expert advice on kayaking during pregnancy
Conclusion Summary of key points and recommendations

To ensure a safe kayaking experience during pregnancy, it’s important to take certain safety precautions. These precautions can help minimize the risks associated with kayaking and ensure the well-being of both the mother and the baby.

Consult with your healthcare provider: Before engaging in any physical activity during pregnancy, it’s important to consult with your healthcare provider. They can provide personalized advice based on your individual circumstances and help you determine if kayaking is safe for you.

Wear a properly fitting life jacket: Wearing a life jacket is essential for safety while kayaking, especially during pregnancy. Make sure to choose a life jacket that fits properly and provides adequate buoyancy.

Stay hydrated and avoid overheating: Pregnant women are more prone to dehydration and overheating, so it’s important to drink plenty of water before, during, and after kayaking. Take breaks when needed and listen to your body.

Avoid kayaking alone: It’s always safer to kayak with a partner, especially during pregnancy. Having someone with you can provide assistance in case of an emergency and ensure that you have support if needed.

Know your limits and listen to your body: Pregnancy can affect your physical abilities, so it’s important to know your limits and listen to your body. If you feel tired or uncomfortable, take a break or stop kayaking altogether.

Choosing the Right Kayak and Equipment for Pregnant Women

Choosing the right kayak and equipment is crucial for a safe and comfortable kayaking experience during pregnancy. Here are some considerations to keep in mind:

Consider a wider, more stable kayak: Opt for a wider kayak with a stable hull design. This will provide better stability and balance, reducing the risk of capsizing.

Choose a kayak with a comfortable seat: Look for a kayak with a comfortable seat that provides adequate support for your back. This will help minimize discomfort and strain on your lower back.

Use a paddle with a smaller blade: Using a paddle with a smaller blade can help reduce strain on your arms and shoulders. This is especially important during pregnancy when your body is already undergoing changes.

Wear appropriate clothing and footwear: Choose clothing that is comfortable and allows for ease of movement. Avoid wearing tight or restrictive clothing that may restrict blood flow. Additionally, wear footwear that provides good traction to prevent slipping.

The Importance of Proper Technique and Form When Kayaking During Pregnancy

Proper technique and form are essential when kayaking during pregnancy to minimize the risk of injury. Here are some tips to keep in mind:

Proper paddling technique to avoid injury: Learn and practice proper paddling technique to avoid strain on your arms, shoulders, and back. Engage your core muscles and use your entire body to paddle, rather than relying solely on your arms.

Maintaining good posture and alignment: Maintain good posture and alignment while kayaking to prevent strain on your back and neck. Sit up straight and avoid slouching or leaning to one side.

Avoiding sudden movements or jerky motions: Avoid sudden movements or jerky motions while kayaking, as these can increase the risk of injury. Move slowly and smoothly, using controlled movements.

Planning Your Kayaking Trip: Tips for Safe and Enjoyable Adventures

When planning a kayaking trip during pregnancy, it’s important to prioritize safety and ensure an enjoyable experience. Here are some tips to keep in mind:

Choose calm, flat water: Opt for calm, flat water for your kayaking trip. Avoid areas with strong currents or rough waves, as these can increase the risk of capsizing.

Avoid kayaking in extreme weather conditions: Check the weather forecast before heading out on your kayaking trip. Avoid kayaking in extreme weather conditions such as high winds, thunderstorms, or excessive heat.

Plan for frequent breaks and rest periods: Take frequent breaks and rest periods during your kayaking trip to avoid overexertion. Use these breaks to hydrate, eat snacks, and rest.

Bring snacks and water: Pack plenty of snacks and water for your kayaking trip to stay nourished and hydrated. Choose snacks that are easy to eat on the go and provide sustained energy.

Common Concerns and Questions About Kayaking During Pregnancy: Answered

There are several common concerns and questions that pregnant women may have about kayaking. Here are some answers to address these concerns:

Can I kayak during any trimester? The safety of kayaking during pregnancy can vary depending on the individual and their specific circumstances. It’s important to consult with your healthcare provider to determine if it is safe for you to kayak during each trimester.

What if I fall out of the kayak? Falling out of a kayak can be dangerous during pregnancy. It’s important to wear a properly fitting life jacket and kayak in calm, flat water to minimize the risk of falling out. If you do fall out, try to stay calm and swim to the nearest shore or wait for assistance.

Can I kayak if I have gestational diabetes? If you have gestational diabetes, it’s important to consult with your healthcare provider before engaging in any physical activity, including kayaking. They can provide personalized advice based on your specific condition and help you determine if kayaking is safe for you.

Alternative Water Sports and Activities for Pregnant Women

If kayaking is not suitable or appealing during pregnancy, there are several alternative water sports and activities that can provide similar benefits. Here are some options to consider:

Stand-up paddleboarding: Stand-up paddleboarding is a low-impact activity that provides a full-body workout. It can help improve balance, strength, and cardiovascular health.

Canoeing: Canoeing is another low-impact water activity that can be enjoyed during pregnancy. It offers a great upper body workout and allows for a leisurely exploration of calm waters.

Swimming: Swimming is a safe and effective form of exercise during pregnancy. It provides a full-body workout without putting stress on the joints.

Making Informed Decisions About Kayaking During Pregnancy

Kayaking during pregnancy can offer numerous benefits for both physical and mental health. However, it’s important to understand the risks involved and take appropriate safety precautions. By consulting with a healthcare provider, choosing the right equipment, practicing proper technique, and planning your kayaking trips carefully, you can enjoy this activity safely during pregnancy. Remember to prioritize your safety and listen to your body at all times.

abcdhe-16

Ride the Waves: Discover the Best Time to Buy Your Dream Kayak

Choosing the right time to buy a kayak can make a significant difference in terms of price and availability. Whether you are a beginner looking to purchase your first kayak or an experienced paddler in search of an upgrade, timing your purchase can help you save money and find the best deals. In this article, we will explore the importance of timing when buying a kayak and discuss the factors to consider when choosing the right time to buy.

Key Takeaways

  • Choosing the right time to buy a kayak can save you money and get you a better deal.
  • Springtime is the best time for beginners to buy a kayak, as there are more options and better deals available.
  • Summer is the season for high demand and high prices, so it’s best to avoid buying during this time.
  • Fall is the perfect time to score an end-of-season deal on a kayak.
  • Winter is the off-season, which means savings and special promotions are available.

Understanding Kayak Seasons: When to Shop for the Best Deals

The kayak market experiences different seasons throughout the year, and each season has its impact on prices and availability. By understanding these seasons, you can take advantage of seasonal discounts and promotions to get the best deals on your kayak purchase.

1. Springtime: The Best Time to Buy a Kayak for Beginners

Spring is an excellent time for beginners to buy a kayak. As the weather starts to warm up, more people become interested in outdoor activities like kayaking. This increased demand often leads to manufacturers and retailers offering special deals and discounts to attract new customers.

During the spring season, it is essential to keep an eye out for sales and promotions from both online and brick-and-mortar stores. Many retailers offer package deals that include essential accessories like paddles and life jackets, making it a great time to get everything you need in one purchase.

2. Summer: The Season for High Demand and High Prices

Summer is the peak season for kayak sales, as people flock to the waterways to enjoy the warm weather. With high demand comes high prices, so it can be challenging to find good deals during this time. However, with some research and patience, it is still possible to get a good deal on a kayak during the summer months.

One strategy is to look for clearance sales at the end of summer when retailers are trying to make room for new inventory. Additionally, keep an eye out for special promotions or discounts offered by manufacturers or retailers. It may require some extra effort, but it is possible to find a great deal even during the summer season.

3. Fall: The Perfect Time to Score an End-of-Season Deal

Fall is an excellent time to buy a kayak, especially if you are looking for an end-of-season deal. As the summer season comes to a close, retailers often offer significant discounts on their remaining inventory to make way for new models. This is a great opportunity to get a high-quality kayak at a fraction of the original price.

When shopping for end-of-season deals, it is essential to act quickly as inventory may be limited. Research different retailers and online platforms to compare prices and availability. Additionally, consider attending local kayak shows or expos where you can often find great deals on both new and used kayaks.

4. Winter: Off-Season Savings and Special Promotions

Winter is considered the off-season for kayaking in many parts of the world. During this time, retailers often offer special promotions and discounts to attract customers. While the selection may be more limited compared to other seasons, you can still find great deals on kayaks during the winter months.

One advantage of buying a kayak in winter is that you have more time to research and compare different models and brands. Take advantage of online resources and reviews to make an informed decision. Additionally, consider reaching out to local kayak clubs or communities as they may have members looking to sell their kayaks at discounted prices.

Buying Used vs. New: Factors to Consider for Each Season

When deciding whether to buy a new or used kayak, there are several factors to consider, including your budget, preferences, and the season in which you are making your purchase.

1. Pros and Cons of Buying a New Kayak

Buying a new kayak offers several advantages. You have the opportunity to choose from the latest models and designs, and you can often customize your kayak to suit your specific needs. Additionally, new kayaks typically come with warranties, giving you peace of mind in case of any manufacturing defects.

However, buying a new kayak can be more expensive compared to buying used. If budget is a concern, you may need to wait for the right season or look for special promotions to get a good deal on a new kayak.

2. Pros and Cons of Buying a Used Kayak

Buying a used kayak can be a cost-effective option, especially if you are just starting and want to try out kayaking without making a significant financial commitment. Used kayaks are often sold at lower prices than new ones, and you may be able to find high-quality kayaks that have been well-maintained by their previous owners.

However, when buying a used kayak, it is essential to thoroughly inspect the kayak for any signs of damage or wear. Check for any cracks or leaks, and make sure all the necessary accessories are included. Additionally, consider the age of the kayak and whether it has been stored properly to avoid any potential issues down the line.

Where to Shop: Finding the Best Kayak Deals Online and In-Store

Store Name Online/In-Store Price Range Shipping Options Return Policy
REI Online/In-Store 300-1500 Free shipping over 50 90-day return policy
Dick’s Sporting Goods Online/In-Store 200-1000 Free shipping over 49 60-day return policy
Cabela’s Online/In-Store 300-2000 Free shipping over 50 90-day return policy
Bass Pro Shops Online/In-Store 200-1500 Free shipping over 50 60-day return policy
Austin Kayak Online 300-2000 Free shipping over 49 45-day return policy

When it comes to shopping for kayaks, there are several options available both online and in-store. Each option has its advantages and disadvantages, so it is important to consider your preferences and needs when deciding where to make your purchase.

1. Online Shopping

Online shopping offers convenience and access to a wide range of options. You can easily compare prices and read reviews from other customers before making your decision. Additionally, many online retailers offer free shipping or delivery options, saving you time and money.

When shopping online for a kayak, it is important to research the seller’s reputation and read customer reviews. Look for websites that offer secure payment options and have a good return policy in case you are not satisfied with your purchase. Additionally, consider the shipping costs and delivery times to ensure a smooth buying experience.

2. In-Store Shopping

Shopping for a kayak in-store allows you to see and touch the kayak before making your purchase. You can also receive expert advice from knowledgeable staff who can help you choose the right kayak for your needs. Additionally, some retailers may offer in-store promotions or discounts that are not available online.

When shopping in-store, take the time to test out different kayaks and ask questions to ensure you are making an informed decision. Compare prices and features across different stores to make sure you are getting the best deal. Additionally, consider the store’s return policy and warranty options in case you encounter any issues with your kayak after purchase.

Tips for Negotiating Prices and Getting the Best Value for Your Money

When buying a kayak, it is important to negotiate prices and get the best value for your money. Here are some tips to help you get the most out of your kayak purchase:

1. Do Your Research

Before entering into negotiations, do your research and have a clear understanding of the market value of the kayak you are interested in. Compare prices across different retailers and online platforms to get an idea of what is a fair price.

2. Be Prepared to Walk Away

If the seller is not willing to negotiate or meet your desired price, be prepared to walk away. There are often other options available, and it is better to wait for a better deal than to settle for something that does not meet your expectations.

3. Bundle Deals

Consider bundling accessories or additional items with your kayak purchase. Many retailers offer package deals that include paddles, life jackets, or other essential accessories at a discounted price when purchased together with a kayak.

4. Consider Financing Options

If budget is a concern, consider exploring financing options offered by retailers. Many stores offer financing plans with low or no interest rates, allowing you to spread out the cost of your kayak purchase over time.

Get Ready to Ride the Waves with Your Dream Kayak!

Choosing the right time to buy a kayak can make a significant difference in terms of price and availability. By understanding the different seasons and their impact on kayak prices, you can take advantage of seasonal discounts and promotions to get the best deals on your kayak purchase.

Whether you are a beginner looking for your first kayak or an experienced paddler in search of an upgrade, there is a perfect time to buy a kayak for everyone. Consider your budget, preferences, and the season in which you are making your purchase to make an informed decision.

So, get ready to ride the waves with your dream kayak! Start researching and comparing different options today to find the best deal that suits your needs. Whether you choose to buy new or used, online or in-store, there is a perfect kayak waiting for you. Happy paddling!

abcdhe-14

Discover the Best Kayaking Spots in Northern California: A Guide to Paddling Paradise

Northern California is a haven for outdoor enthusiasts, and its kayaking scene is no exception. With its diverse landscapes, stunning waterways, and abundant wildlife, Northern California offers a kayaking experience like no other. Whether you’re a beginner or an experienced paddler, there are plenty of options to suit your skill level and interests. From paddling through the majestic redwoods to exploring hidden gems off the beaten path, Northern California has something for everyone.

One of the reasons why Northern California is such a great destination for kayaking enthusiasts is its vast array of waterways. From rivers and lakes to the Pacific Ocean, there are endless opportunities to explore and discover new places. The region’s diverse geography also means that there are different types of kayaking experiences available, from calm and serene waters to more challenging rapids. Whether you’re looking for a peaceful paddle or an adrenaline-filled adventure, Northern California has it all.

Key Takeaways

  • Northern California is a kayaking paradise with stunning natural beauty and diverse wildlife.
  • Top kayaking destinations include Lake Tahoe, Mendocino Coast, and Tomales Bay.
  • Paddling through the majestic redwoods is a kayaker’s dream, with calm waters and breathtaking scenery.
  • Wildlife and nature lovers will enjoy kayaking at Point Reyes National Seashore and Elkhorn Slough.
  • Iconic waterways like the Russian River and Sacramento River offer unique kayaking experiences.

Top Kayaking Destinations in Northern California

1. Lake Tahoe: Known for its crystal-clear waters and stunning mountain scenery, Lake Tahoe is a popular destination for kayakers. The lake offers a variety of paddling options, from leisurely cruises along the shoreline to more challenging trips across the open water. One of the highlights of kayaking on Lake Tahoe is the opportunity to explore hidden coves and secluded beaches that can only be accessed by water.

2. Russian River: The Russian River is another popular kayaking destination in Northern California. This scenic river winds its way through Sonoma County, offering paddlers a chance to immerse themselves in nature and enjoy the region’s famous wine country. The Russian River is known for its calm and gentle waters, making it an ideal spot for beginners or those looking for a relaxing paddle.

3. Mendocino Coast: For those seeking a more adventurous kayaking experience, the Mendocino Coast is the perfect destination. This rugged coastline is home to sea caves, arches, and towering cliffs, providing a dramatic backdrop for your kayaking adventure. Paddling along the Mendocino Coast offers the opportunity to spot marine wildlife such as seals, sea lions, and even whales.

Paddling through the Majestic Redwoods: A Kayaker’s Dream

One of the most unique and awe-inspiring kayaking experiences in Northern California is paddling through the majestic redwood forests. The towering trees create a magical atmosphere as you glide along the narrow waterways that wind through the forest. The peacefulness and tranquility of this experience are unmatched, making it a must-do for any kayaking enthusiast.

Navigating through the narrow waterways of the redwood forests can be challenging, but with the right technique and preparation, it can be a rewarding experience. It’s important to choose a kayak that is suitable for navigating tight spaces and shallow waters. A sit-on-top kayak or a kayak with a rudder can be helpful in maneuvering through the narrow channels. It’s also important to be mindful of low-hanging branches and fallen trees, as they can obstruct your path.

The Best Kayaking Spots for Wildlife and Nature Lovers

Kayaking Spot Wildlife Nature
Everglades National Park, Florida Alligators, manatees, dolphins, turtles, birds Mangrove forests, sawgrass prairies, freshwater sloughs
Prince William Sound, Alaska Whales, sea otters, seals, sea lions, eagles Glaciers, fjords, waterfalls, mountains
Boundary Waters Canoe Area Wilderness, Minnesota Moose, wolves, beavers, loons, bald eagles Forests, lakes, rivers, rocky outcrops
San Juan Islands, Washington Orcas, seals, sea lions, otters, eagles Islands, kelp forests, rocky shores, tide pools
Big Bend National Park, Texas Javelinas, coyotes, roadrunners, snakes, birds Deserts, canyons, mountains, Rio Grande river

Northern California is home to a diverse range of wildlife and natural beauty, making it an ideal destination for wildlife and nature lovers. There are several kayaking spots in the region that offer excellent opportunities for observing wildlife in their natural habitat.

One such spot is the Elkhorn Slough in Moss Landing. This estuary is home to a variety of bird species, including herons, egrets, and pelicans. Paddling through the slough allows you to get up close and personal with these beautiful creatures and observe their behavior in a peaceful setting.

Another great spot for wildlife enthusiasts is Tomales Bay in Point Reyes National Seashore. This protected bay is a haven for harbor seals, sea lions, and a variety of bird species. Kayaking along the bay allows you to observe these animals from a safe distance without disturbing their natural habitat.

When kayaking in areas known for wildlife, it’s important to be respectful and mindful of the animals. Keep a safe distance and avoid approaching them too closely. It’s also important to be aware of your surroundings and follow any guidelines or regulations set by the local authorities.

Kayaking the Iconic Waterways of Northern California

Northern California is home to several iconic waterways that are a must-visit for any kayaking enthusiast. These waterways offer stunning scenery, unique experiences, and a chance to explore some of the region’s most famous landmarks.

One such iconic waterway is the Sacramento River. This mighty river flows through the heart of Northern California, offering paddlers a chance to experience its beauty up close. Kayaking on the Sacramento River allows you to paddle past historic towns, vineyards, and even the iconic Sundial Bridge in Redding.

Another iconic waterway in Northern California is the San Francisco Bay. Paddling across the bay offers breathtaking views of the Golden Gate Bridge, Alcatraz Island, and the city skyline. It’s important to be aware of the tides and currents when kayaking in the bay, as they can be strong and unpredictable.

Exploring the Hidden Gems: Off-the-Beaten-Path Kayaking Spots

While Northern California is known for its popular kayaking destinations, there are also plenty of hidden gems waiting to be discovered. These off-the-beaten-path spots offer a chance to escape the crowds and explore lesser-known areas of the region.

One such hidden gem is Lake Sonoma in Sonoma County. This reservoir offers calm and peaceful waters surrounded by rolling hills and oak woodlands. Paddling on Lake Sonoma allows you to enjoy the serenity of nature and spot wildlife such as deer, osprey, and bald eagles.

Another hidden gem is the Eel River in Humboldt County. This remote river is known for its pristine beauty and untouched wilderness. Paddling on the Eel River offers a chance to immerse yourself in nature and experience the true wildness of Northern California.

Kayaking Adventures for All Skill Levels

Whether you’re a beginner or an experienced kayaker, Northern California offers a variety of kayaking adventures to suit your skill level. From calm and gentle waters to more challenging rapids, there’s something for everyone.

For beginners, the Russian River is a great place to start. The calm and gentle waters make it an ideal spot for learning the basics of kayaking. There are also several rental shops and guided tours available, making it easy for beginners to get started.

Intermediate kayakers can try their hand at paddling on Lake Tahoe. While the lake can be calm and serene, it can also be subject to strong winds and choppy waters, providing a bit more of a challenge. It’s important for intermediate kayakers to be comfortable with basic paddling techniques and have some experience in handling different water conditions.

Advanced kayakers looking for a thrill can tackle the whitewater rapids of the Trinity River. This challenging river offers Class III and IV rapids, providing an adrenaline-filled adventure for experienced paddlers. It’s important for advanced kayakers to have proper training and experience in whitewater kayaking before attempting this type of adventure.

Planning Your Northern California Kayaking Trip: Tips and Tricks

Planning a successful kayaking trip in Northern California requires careful preparation and consideration. Here are some tips and tricks to help you plan your adventure:

1. Research your destination: Before heading out on your kayaking trip, take the time to research your destination. Familiarize yourself with the water conditions, local regulations, and any potential hazards or challenges you may encounter.

2. Pack the essentials: When packing for your kayaking trip, make sure to bring the essentials. This includes a life jacket, paddle, dry bag, sunscreen, water, and snacks. It’s also a good idea to bring a map or GPS device to help navigate your way.

3. Check the weather: Before setting out on your kayaking adventure, check the weather forecast. Avoid kayaking in strong winds, thunderstorms, or other hazardous conditions. It’s always better to err on the side of caution and postpone your trip if necessary.

4. Choose the right kayak: When choosing a kayak for your trip, consider the type of water you’ll be paddling on and your skill level. Sit-on-top kayaks are great for beginners and calm waters, while sea kayaks are better suited for open water and more challenging conditions.

5. Plan for emergencies: It’s important to be prepared for emergencies when kayaking. Make sure to bring a first aid kit, a whistle or signaling device, and a communication device such as a cell phone or radio. It’s also a good idea to let someone know your itinerary and expected return time.

Safety Precautions for Kayaking in Northern California

While kayaking in Northern California can be a thrilling and rewarding experience, it’s important to prioritize safety. Here are some safety precautions to keep in mind:

1. Wear a life jacket: Always wear a properly fitting life jacket when kayaking. This will help keep you afloat in case of an accident or capsize.

2. Be aware of your surroundings: Pay attention to your surroundings and be aware of any potential hazards such as rocks, fallen trees, or strong currents. Avoid paddling in areas with heavy boat traffic or dangerous wildlife.

3. Practice proper paddling techniques: Learn and practice proper paddling techniques to ensure efficient and safe maneuvering. This includes using proper body mechanics, maintaining a good posture, and using the correct paddle strokes.

4. Stay hydrated and protected from the sun: Drink plenty of water to stay hydrated and protect yourself from the sun’s harmful rays. Wear sunscreen, a hat, and sunglasses to protect your skin and eyes from the sun.

5. Know your limits: Be honest with yourself about your skill level and physical abilities. Don’t attempt to paddle in conditions or areas that are beyond your capabilities. It’s always better to choose a safer option or seek professional guidance if needed.

Kayaking and Camping: The Ultimate Northern California Outdoor Experience

For those looking to fully immerse themselves in the beauty of Northern California, combining kayaking with camping is the ultimate outdoor experience. There are several campgrounds located near popular kayaking spots, allowing you to spend multiple days exploring the region’s waterways.

Camping near your kayaking destination allows you to wake up to the sounds of nature, enjoy stunning sunsets, and have easy access to the water. Many campgrounds offer amenities such as showers, restrooms, and picnic areas, making it convenient for kayakers to relax and recharge after a day on the water.

When planning a kayaking and camping trip, make sure to check if reservations are required for the campground you plan to stay at. It’s also important to pack all the necessary camping gear, including a tent, sleeping bag, cooking equipment, and food.
Northern California is a kayaking paradise with its diverse landscapes, stunning waterways, and abundant wildlife. Whether you’re a beginner or an experienced paddler, there are plenty of options to suit your skill level and interests. From paddling through the majestic redwoods to exploring hidden gems off the beaten path, Northern California offers a kayaking experience like no other. So grab your paddle, pack your gear, and get ready to embark on an unforgettable kayaking adventure in this beautiful region.

abcdhe-12

Kayaking 101: Understanding the Factors that Affect Kayak Stability and the Likelihood of Flipping Over

Kayaking is a popular water sport that has been enjoyed by people for centuries. It originated with the indigenous people of the Arctic region, who used kayaks for hunting and transportation. Today, kayaking has evolved into a recreational activity that can be enjoyed by people of all ages and skill levels.

There are several types of kayaking, including recreational kayaking, touring kayaking, and whitewater kayaking. Recreational kayaking is the most common type and is often done on calm lakes and rivers. Touring kayaking involves longer trips and can be done on open water such as the ocean. Whitewater kayaking is an adrenaline-pumping sport that involves navigating through fast-moving rapids.

Kayaking offers numerous benefits for both physical and mental health. It is a great way to stay active and improve cardiovascular fitness. Paddling also helps to strengthen the muscles in the arms, shoulders, and core. In addition to the physical benefits, kayaking can also provide a sense of peace and tranquility as you glide through the water and connect with nature.

Key Takeaways

  • Kayaking is a popular water sport that requires proper understanding of kayak stability.
  • Kayak stability is affected by factors such as size, shape, weight, and water conditions.
  • Paddling techniques can improve kayak stability, and understanding center of gravity is crucial.
  • Preventing capsizing requires maintaining balance, while safety tips and techniques are necessary in case of capsizing.
  • Choosing the right kayak for your skill level is essential for safe and enjoyable paddling.

Importance of Understanding Kayak Stability

Kayak stability refers to how easily a kayak maintains its balance in the water. It is an important factor to consider for safe and enjoyable paddling. Understanding kayak stability can help prevent accidents and capsizing, allowing you to have a more enjoyable experience on the water.

One common misconception about kayak stability is that wider kayaks are more stable than narrower ones. While it is true that wider kayaks have a larger base and may feel more stable initially, they can also be slower and less maneuverable. On the other hand, narrower kayaks may feel less stable at first but are often faster and more responsive.

Another misconception is that beginners should always choose a stable kayak. While stability is important for beginners, it is also important to choose a kayak that matches your skill level and goals. As you gain experience and confidence, you may want to transition to a more performance-oriented kayak that offers less initial stability but greater maneuverability.

Factors Affecting Kayak Stability: Size, Shape, and Weight

The size, shape, and weight of a kayak can greatly affect its stability. Generally, longer kayaks tend to be more stable than shorter ones. This is because longer kayaks have a larger surface area in contact with the water, providing more stability. However, longer kayaks can also be slower and less maneuverable.

The shape of a kayak also plays a role in its stability. Kayaks with a flat bottom tend to be more stable than those with a rounded or V-shaped hull. Flat-bottomed kayaks have a larger base and are less likely to tip over. However, they can also be slower and less responsive.

Weight distribution is another important factor to consider for kayak stability. The center of gravity should be low and centered in the kayak to maintain balance. If the weight is unevenly distributed or too high, it can cause the kayak to become unstable and prone to tipping over.

When choosing a kayak, it is important to consider your own size and weight as well. A kayak that is too small or too large for your body type may feel unstable and uncomfortable to paddle.

Paddling Techniques for Improved Stability

Technique Description Benefits
Low Brace Placing the paddle blade flat on the water surface to prevent capsizing. Improves balance and stability in rough water conditions.
High Brace Placing the paddle blade perpendicular to the water surface to prevent capsizing. Improves balance and stability in calm water conditions.
Sweep Stroke Using a wide, sweeping motion to turn the kayak. Improves control and stability while turning.
Draw Stroke Pulling the paddle towards the kayak to move sideways. Improves stability and maneuverability in tight spaces.
J-Stroke Adding a slight twist to the paddle on the recovery stroke to keep the kayak moving straight. Improves efficiency and stability while paddling in a straight line.

Proper paddling technique is essential for maintaining balance and stability while kayaking. One of the most important aspects of paddling technique is using your core muscles to stabilize your body. By engaging your core muscles and keeping your torso upright, you can maintain balance and prevent tipping.

It is also important to use proper paddle strokes to maintain stability. The most common paddle stroke is the forward stroke, which involves reaching forward with the paddle blade, planting it in the water near your feet, and pulling it back towards your hips. This stroke should be done smoothly and evenly on both sides to maintain balance.

Another important technique for stability is the low brace. The low brace involves placing the paddle blade flat on the water and using it to support your body weight. This can help prevent capsizing in rough water or when you lose your balance.

Avoiding common mistakes can also improve stability while paddling. One common mistake is gripping the paddle too tightly, which can cause tension in the arms and shoulders and make it more difficult to maintain balance. It is important to hold the paddle with a relaxed grip and use your core muscles to stabilize your body.

Understanding Center of Gravity and its Impact on Kayak Stability

The center of gravity refers to the point at which an object’s weight is evenly distributed. In kayaking, understanding your center of gravity is crucial for maintaining stability. The lower and more centered your center of gravity is, the more stable your kayak will be.

To adjust your center of gravity, it is important to sit upright in the kayak with your back straight and your feet positioned evenly on the footrests. Avoid leaning too far forward or backward, as this can shift your center of gravity and make the kayak less stable.

It is also important to distribute your weight evenly in the kayak. If you lean too much to one side, it can cause the kayak to tilt and become unstable. By keeping your weight centered and evenly distributed, you can maintain balance and stability.

Water Conditions and their Effect on Kayak Stability

Different water conditions can greatly affect kayak stability. Calm water, such as a calm lake or slow-moving river, provides a stable environment for paddling. However, even in calm water, it is important to be aware of changes in stability caused by wind or currents.

Rough water, such as choppy waves or fast-moving rapids, can make kayaking more challenging and require greater stability. In rough water, it is important to use proper paddling techniques and maintain a low center of gravity to prevent capsizing.

Reading the water is an important skill for anticipating changes in stability. By observing the movement and patterns of the water, you can anticipate changes in currents, waves, and eddies that may affect your stability. This can help you make adjustments to your paddling technique and maintain balance.

How to Prevent Capsizing: Tips for Maintaining Balance

Maintaining balance is key to preventing capsizing while kayaking. There are several tips and techniques that can help you maintain balance and stability on the water.

One tip is to keep your body relaxed and loose while paddling. Tension in the body can make it more difficult to maintain balance. By staying relaxed and loose, you can better respond to changes in stability and make adjustments as needed.

Another tip is to use your paddle as a stabilizer. By placing the paddle blade flat on the water and using it to support your body weight, you can prevent tipping and maintain balance. This technique, known as bracing, can be especially useful in rough water or when you lose your balance.

It is also important to maintain a proper posture while paddling. Sitting upright with your back straight and your feet positioned evenly on the footrests can help maintain balance and stability. Avoid leaning too far forward or backward, as this can shift your center of gravity and make the kayak less stable.

What to Do When You Capsize: Safety Tips and Techniques

Despite your best efforts, there may be times when you capsize while kayaking. It is important to know what to do in this situation to ensure your safety.

The first step is to stay calm. Panicking can make it more difficult to think clearly and respond effectively. Take a deep breath and assess the situation before taking any action.

Once you are calm, the next step is to safely exit the capsized kayak. To do this, reach for the grab loop on the side of the kayak and pull yourself towards it. This will help you to stay close to the kayak and prevent drifting away.

Once you are out of the kayak, it is important to stay safe in the water. If you are wearing a life jacket, it will help to keep you afloat. If you are in a group, try to stay together and support each other.

If you see someone else capsizing, it is important to know how to rescue them. One technique is to use your paddle as a reach aid. Extend the paddle towards the person in the water and allow them to grab onto it. Once they have a firm grip, use your body weight to pull them towards you and back into their kayak.

Choosing the Right Kayak for Your Skill Level

Choosing the right kayak is crucial for your safety and enjoyment on the water. There are several factors to consider when selecting a kayak that matches your skill level.

One factor to consider is the type of kayaking you plan to do. If you are a beginner or plan to do mostly recreational kayaking on calm lakes and rivers, a stable and easy-to-paddle kayak may be the best choice. On the other hand, if you have more experience or plan to do touring or whitewater kayaking, a more performance-oriented kayak may be more suitable.

Another factor to consider is your size and weight. A kayak that is too small or too large for your body type may feel unstable and uncomfortable to paddle. It is important to choose a kayak that fits your body properly and provides adequate support.

Testing a kayak before purchasing is also important. Many kayak rental shops offer the opportunity to test different models before making a purchase. This can help you determine which kayak feels most stable and comfortable for your skill level.

Mastering Kayak Stability for Safe and Enjoyable Paddling

In conclusion, understanding kayak stability is crucial for safe and enjoyable paddling. By understanding the factors that affect kayak stability, such as size, shape, and weight, you can choose a kayak that matches your skill level and goals. By using proper paddling techniques and maintaining a low center of gravity, you can improve your stability on the water. By being aware of water conditions and reading the water, you can anticipate changes in stability and make adjustments as needed. And by knowing what to do in the event of a capsize and how to rescue others, you can ensure your safety and the safety of those around you. With practice and experience, you can master kayak stability and enjoy safe and enjoyable paddling experiences.

abcdhe-10

Maximizing Space: Tips for Storing Your Kayak in a Small Apartment

Storing a kayak in a small apartment can be a daunting task. With limited space and often no dedicated storage area, finding a suitable solution can be challenging. However, it is important to find a proper storage solution to protect your kayak from damage and ensure it remains in good condition for years to come.

Kayaks are large and bulky, making them difficult to store in small living spaces. They require ample floor space and ceiling height, which can be hard to come by in cramped apartments. Additionally, kayaks are prone to damage if not stored properly. They can get scratched, dented, or even warped if not stored in a secure and stable manner.

Finding the right storage solution is crucial to ensure the longevity of your kayak. It will not only protect your investment but also make it easier for you to access and use your kayak whenever you want. In this article, we will explore different options for storing a kayak in a small apartment and provide tips on how to make the most of your limited space.

Key Takeaways

  • Storing a kayak in a small apartment can be challenging, but there are solutions available.
  • Assess your space to find the best spot for your kayak and choose the right storage solution.
  • Wall-mounted kayak racks can maximize vertical space, while ceiling-mounted hoists utilize overhead space.
  • Kayak storage bags can protect your kayak and save space, and folding storage systems are easy to store.
  • Outdoor kayak storage on balconies and patios can also be an option, and organizing your gear can keep accessories tidy and accessible.

Assessing Your Space: Finding the Best Spot for Your Kayak

Before diving into the various storage options available, it is important to assess your living space to determine the best spot for your kayak. Start by measuring the available floor space and ceiling height in your apartment. This will help you determine which storage solutions will fit within your space constraints.

Consider the layout of your apartment and identify areas that are underutilized or have unused vertical space. Look for corners, alcoves, or even empty walls that can accommodate a kayak storage solution. Keep in mind that you will need enough clearance around the kayak to easily access it and maneuver it in and out of storage.

Choosing the Right Storage Solution: Options for Kayak Storage in Small Spaces

There are several options available for storing a kayak in a small apartment. Each option has its own pros and cons, so it is important to choose the one that best suits your needs and space constraints.

1. Wall-Mounted Kayak Racks: Wall-mounted kayak racks are a popular choice for small apartments as they maximize vertical space. These racks are installed on the wall and hold the kayak horizontally, keeping it off the floor and out of the way. They are easy to install and can accommodate kayaks of different sizes and weights.

One of the main benefits of wall-mounted kayak racks is that they free up valuable floor space. This is especially important in small apartments where every inch counts. Additionally, wall-mounted racks keep the kayak securely in place, preventing it from getting damaged or knocked over.

To install a wall-mounted kayak rack, you will need to find a sturdy wall stud to anchor it to. Make sure to follow the manufacturer’s instructions for installation and use. It is also important to properly secure the kayak to the rack using straps or bungee cords to prevent it from falling.

2. Ceiling-Mounted Kayak Hoists: Ceiling-mounted kayak hoists are another great option for small apartments. These hoists utilize overhead space, allowing you to store your kayak out of the way and free up floor space. They consist of a pulley system that allows you to easily lift and lower your kayak.

Ceiling-mounted hoists are ideal for apartments with high ceilings as they require enough clearance above the kayak for it to be lifted and lowered safely. They are also a good option if you have limited wall space or if you want to store multiple kayaks.

When installing a ceiling-mounted kayak hoist, make sure to follow the manufacturer’s instructions carefully. It is important to properly secure the hoist to the ceiling joists or beams to ensure it can support the weight of your kayak. Always double-check that the hoist is securely fastened before lifting your kayak.

3. Kayak Storage Bags: If you have limited space in your apartment, consider investing in a kayak storage bag. These bags are designed to protect your kayak from dust, dirt, and damage while also saving space. They are made from durable materials and often have padding or foam inserts to provide extra protection.

Kayak storage bags are easy to use and can be folded or rolled up when not in use, making them a great option for small apartments. They come in different sizes to accommodate kayaks of various lengths and widths. Some bags even have additional pockets or compartments for storing accessories.

To use a kayak storage bag, simply place your kayak inside and zip it up. Make sure to properly secure the bag to prevent it from coming undone or slipping off. It is also a good idea to store the bag in a cool, dry place to prevent any moisture buildup.

Wall-Mounted Kayak Racks: Maximizing Vertical Space

Product Name Dimensions Weight Capacity Material Price
Wall-Mounted Kayak Rack 23.5″ x 15″ x 4″ 100 lbs Steel 49.99
Vertical Kayak Rack 20″ x 20″ x 20″ 150 lbs Aluminum 89.99
Heavy-Duty Kayak Rack 24″ x 24″ x 24″ 200 lbs Steel 129.99

Wall-mounted kayak racks are an excellent option for maximizing vertical space in a small apartment. These racks are installed on the wall and hold the kayak horizontally, keeping it off the floor and out of the way.

One of the main benefits of wall-mounted kayak racks is that they free up valuable floor space. In a small apartment, every inch counts, and having your kayak off the floor can make a big difference. This extra floor space can be used for other purposes or simply left empty to create a more open and spacious feel.

Wall-mounted kayak racks also keep the kayak securely in place, preventing it from getting damaged or knocked over. This is especially important if you live in an apartment with limited space and have to navigate around furniture or other obstacles.

When installing a wall-mounted kayak rack, it is important to find a sturdy wall stud to anchor it to. This will ensure that the rack can support the weight of your kayak without coming loose or falling off the wall. Make sure to follow the manufacturer’s instructions for installation and use, and always double-check that the rack is securely fastened before placing your kayak on it.

To use a wall-mounted kayak rack, simply place your kayak on the rack horizontally. Make sure to properly secure the kayak to the rack using straps or bungee cords to prevent it from falling. It is also a good idea to periodically check the rack for any signs of wear or damage and make any necessary repairs or replacements.

Ceiling-Mounted Kayak Hoists: Utilizing Overhead Space

Ceiling-mounted kayak hoists are another great option for small apartments. These hoists utilize overhead space, allowing you to store your kayak out of the way and free up floor space.

One of the main benefits of ceiling-mounted kayak hoists is that they can accommodate kayaks of different sizes and weights. This makes them a versatile option for small apartments where space is limited. Whether you have a small recreational kayak or a larger touring kayak, a ceiling-mounted hoist can safely lift and lower it.

Ceiling-mounted hoists are also ideal if you have limited wall space or if you want to store multiple kayaks. They can be installed in any area with enough clearance above the kayak for it to be lifted and lowered safely.

When installing a ceiling-mounted kayak hoist, it is important to follow the manufacturer’s instructions carefully. Make sure to properly secure the hoist to the ceiling joists or beams to ensure it can support the weight of your kayak. Always double-check that the hoist is securely fastened before lifting your kayak.

To use a ceiling-mounted kayak hoist, simply attach the straps or hooks to your kayak and use the pulley system to lift it up. Make sure to lift the kayak slowly and evenly to prevent any swinging or tipping. When lowering the kayak, do so with caution and make sure to guide it down gently to avoid any sudden drops.

Kayak Storage Bags: Protecting Your Kayak and Saving Space

If you have limited space in your apartment, consider investing in a kayak storage bag. These bags are designed to protect your kayak from dust, dirt, and damage while also saving space.

One of the main benefits of kayak storage bags is that they can be folded or rolled up when not in use. This makes them a great option for small apartments where space is at a premium. You can easily store the bag in a closet, under a bed, or even in a corner without taking up much space.

Kayak storage bags are made from durable materials that are resistant to tears and punctures. They often have padding or foam inserts to provide extra protection for your kayak. Some bags even have additional pockets or compartments for storing accessories such as paddles, life jackets, or spray skirts.

When choosing a kayak storage bag, make sure to consider the size and weight of your kayak. Bags come in different sizes to accommodate kayaks of various lengths and widths. It is important to choose a bag that fits your kayak snugly to prevent any shifting or movement during storage.

To use a kayak storage bag, simply place your kayak inside and zip it up. Make sure to properly secure the bag to prevent it from coming undone or slipping off. It is also a good idea to store the bag in a cool, dry place to prevent any moisture buildup that could lead to mold or mildew.

Folding Kayak Storage Systems: Easy-to-Store Options for Small Apartments

Folding kayak storage systems are another great option for small apartments. These systems are designed to be easy to store when not in use, making them ideal for apartments with limited space.

One of the main benefits of folding kayak storage systems is that they can be collapsed or folded down when not in use. This allows you to easily store them in a closet, under a bed, or even in a corner without taking up much space. When you want to use your kayak, simply unfold or expand the storage system and place your kayak on it.

Folding kayak storage systems come in different designs and configurations. Some are made from lightweight materials such as aluminum or plastic, while others are made from more durable materials such as steel. It is important to choose a system that is sturdy enough to support the weight of your kayak and that can be easily folded or collapsed.

When using a folding kayak storage system, make sure to properly secure your kayak to prevent it from falling or shifting. Use straps or bungee cords to secure the kayak to the storage system and periodically check for any signs of wear or damage.

Outdoor Kayak Storage: Making the Most of Balconies and Patios

If you have access to an outdoor space such as a balcony or patio, consider utilizing it for kayak storage. Outdoor storage can be a great option for small apartments as it allows you to free up valuable indoor space.

One of the main benefits of outdoor kayak storage is that it keeps your kayak out of the way and frees up floor space in your apartment. This is especially important if you have limited space and need to make the most of every inch.

When storing your kayak outdoors, it is important to choose a location that is protected from the elements. Direct sunlight, rain, and extreme temperatures can all cause damage to your kayak over time. Look for a spot that is shaded or covered, such as under an awning or in a storage shed.

To protect your kayak from theft, consider using a lock or security cable to secure it to a fixed object such as a railing or post. This will deter potential thieves and give you peace of mind knowing that your kayak is safe and secure.

Organizing Your Kayak Gear: Tips for Keeping Accessories Tidy and Accessible

In addition to storing your kayak, it is important to keep your kayak gear organized and easily accessible. This will make it easier for you to find and use your gear whenever you want to go kayaking.

One of the best ways to keep your kayak gear organized is to use storage bins or containers. These can be placed on shelves, in closets, or even under your bed. Use separate bins for different types of gear such as paddles, life jackets, spray skirts, and dry bags.

Label each bin or container to make it easy to find what you need. This will save you time and frustration when you are getting ready for a kayaking trip. Consider using clear bins or containers so you can easily see what is inside without having to open them.

Another tip for organizing your kayak gear is to use hooks or racks to hang items such as paddles, life jackets, and spray skirts. This will keep them off the floor and out of the way, making more space available for other items.

Consider using a pegboard or wall-mounted organizer to hang your gear. This will allow you to easily see and access your gear while also keeping it tidy and organized. Make sure to properly secure the hooks or racks to the wall to prevent them from coming loose or falling.

Making the Most of Your Small Space with Smart Kayak Storage Solutions

Storing a kayak in a small apartment can be a challenge, but with the right storage solution, it is possible to make the most of your limited space. Whether you choose a wall-mounted rack, a ceiling-mounted hoist, a storage bag, or an outdoor storage solution, there are options available for every situation.

By assessing your living space and considering factors such as available floor space and ceiling height, you can determine the best spot for your kayak. From there, you can choose the storage solution that best suits your needs and space constraints.

Remember to properly secure your kayak and regularly check for any signs of wear or damage. By taking care of your kayak and keeping it stored in a safe and secure manner, you can ensure that it remains in good condition for years to come.